App from Scratch
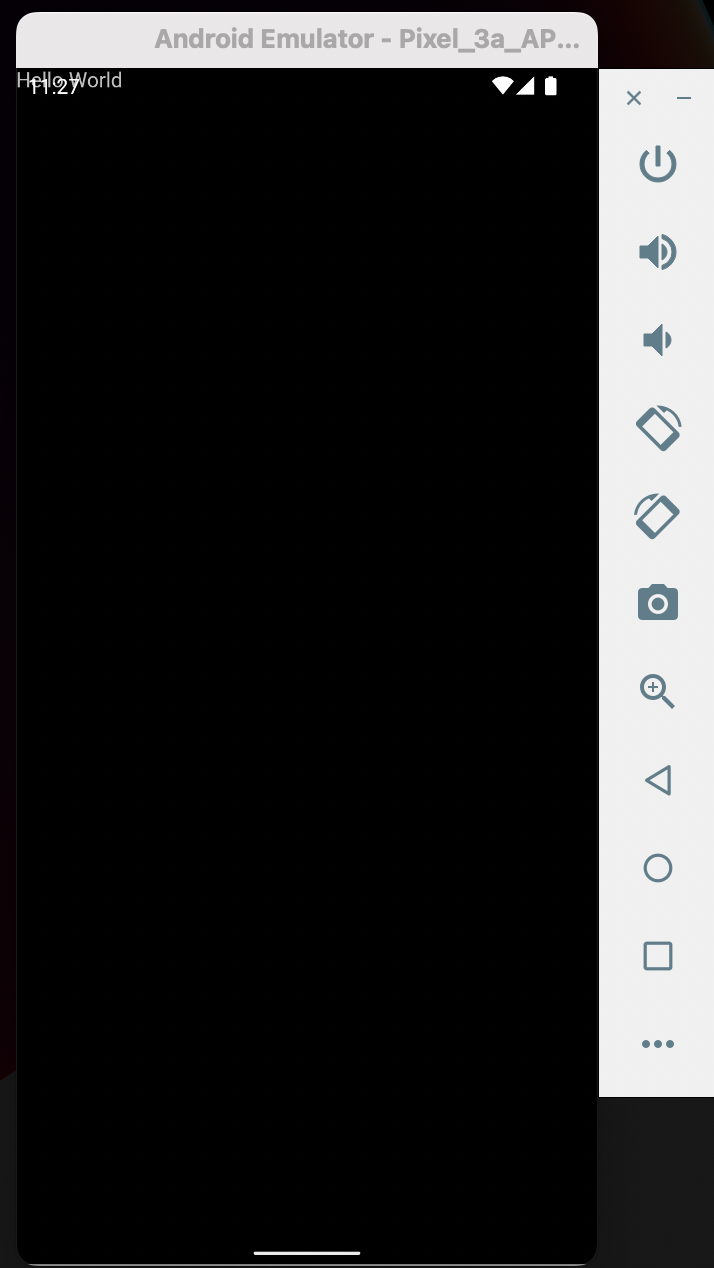
Let's us now understand everything from scratch. The Hello World state with its output is as below:
Note: Ensure to hot restart your app since at this point, hot reload does not still work.
Note: Ensure to hot restart your app since at this point, hot reload does not still work.
First, let's define Widgets:
~ Widgets are the units of building blocks in a Flutter app. They declare and construct UI.
~ A widget is an immutable description of part of a user interface. Widgets can be inflated into elements, which manage the underlying render tree.
Now onto explaining the above codebase:
The import is for use of Material Widgets and Themes in building our app since Flutter has its core UI as the Material UI. The main function is the core function that runs everything, in this case, the renderer initializer, runApp.
The runApp() method is used to initialize and run the app. It takes in a Widget as its argument, which is typically the root of the app's widget hierarchy. This widget is then passed to the FlutterEngine to be rendered on the screen.
In our code, the runApp takes the root widget Text and hence renders text Hello World on screen. You must explicitly specify textDirection attribute or you might get the No Directionality widget found error.
You can pass any widget to the runApp, I chose to use Text for this case.
Stateless Widget
This is a widget that does not require mutable state. For instance, if the widget does not have data that changes on button click or any dynamically updated data, use the Stateless widget.
The build method of a stateless widget is typically only called in three situations: the first time the widget is inserted in the tree, when the widget's parent changes its configuration, and when an InheritedWidget it depends on changes.
Because in our above codebase, we use constant widget with static text data that does not change, we can encapsulate the widget in a stateless widget to be as follows:
Material Design
Since material design will be core when we build apps, we need to configure our widgets to be wrapped with the MaterialApp. It helps by adding material-design specific functionality, such as AnimatedTheme and GridPaper.
Configuring our codebase with Material Design:
Configuring our codebase with Material Design:
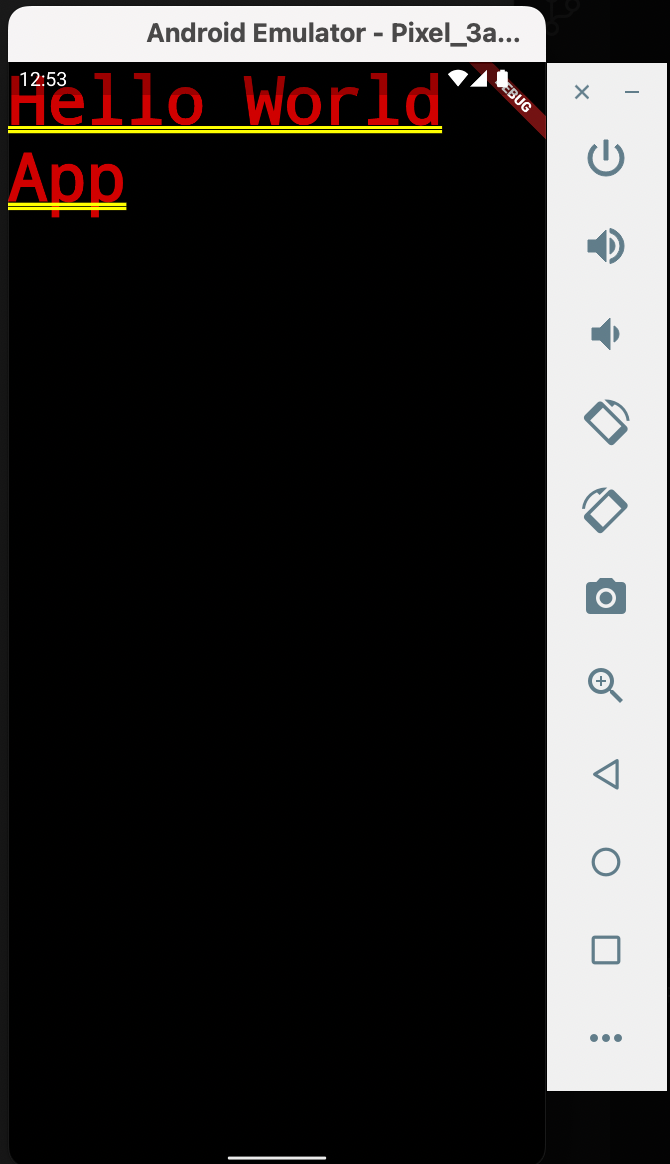
On seeing the app output, we notice that the MaterialApp configures its WidgetsApp.textStyle with an ugly red/yellow text style that's intended to warn the developer that their app hasn't defined a default text style.
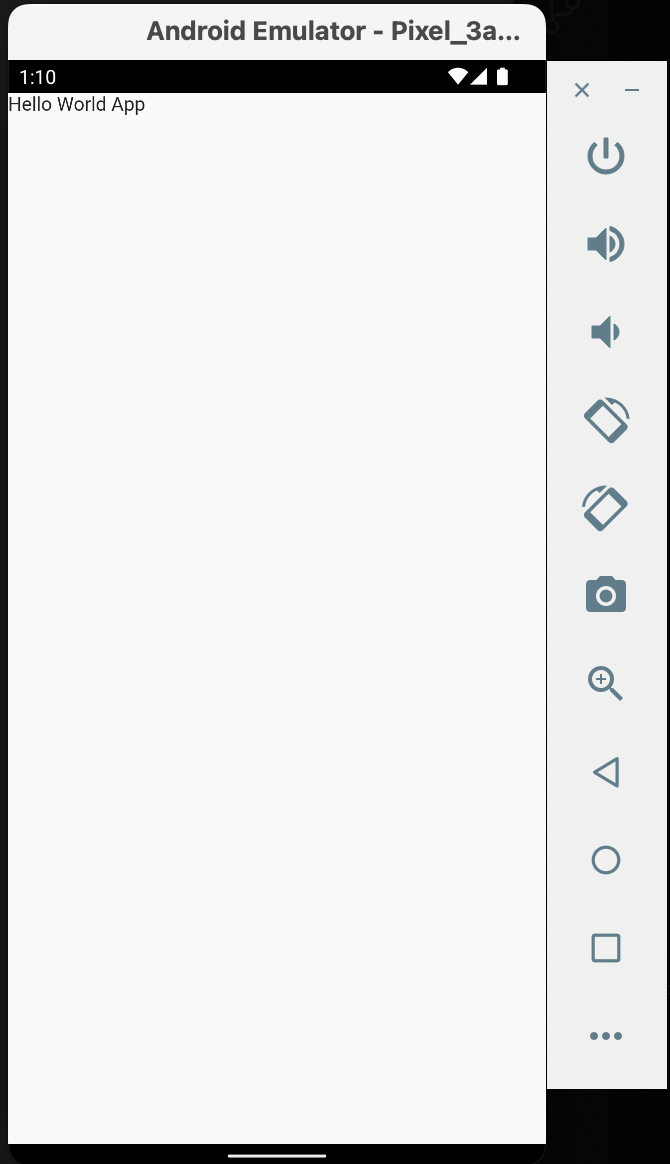
We can correct for this by using the Scaffold widget that is used to implement the basic material design visual layout structure.
We can correct for this by using the Scaffold widget that is used to implement the basic material design visual layout structure.
StatefulWidget widgets
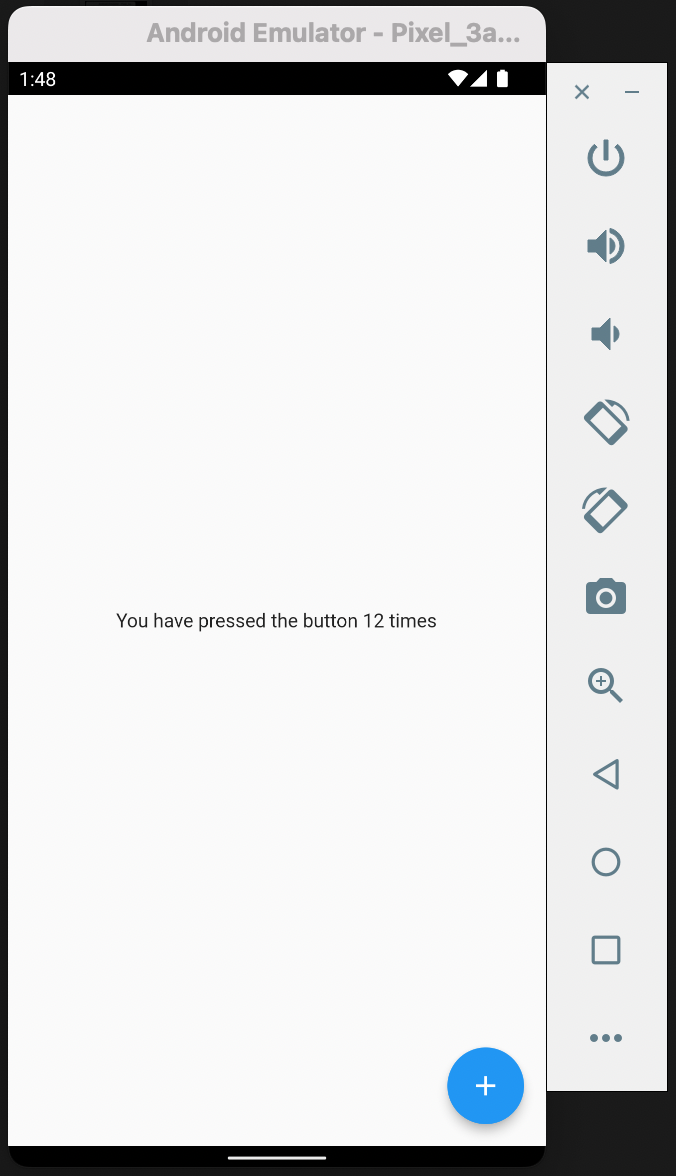
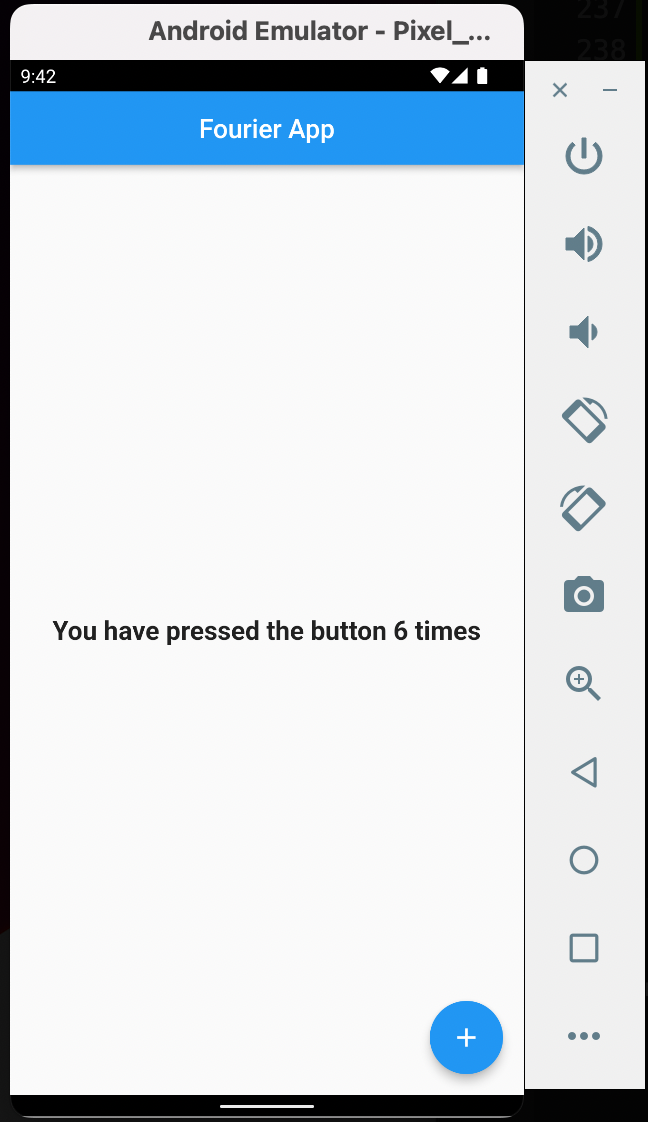
Now, we want to show dynamic data (counter) in text, and then we implement a floatingActionButton that will change the data. To be precise, the counter will be incremented by one every time the action button is clicked. For this reason, we will use the StatefulWidget widget to handle this dynamic data rendering and widget rebuilding.
Hence, we will create a stateful widget and make the Scaffold its root. This implies that the child field of SafeArea will now be injected with the stateful widget created.
In the Scaffold widget (now moved to the stateful widget), we will create the Center widget to center the text data on screen that will have a child Text widget, showing the counter data.
We will also create FloatingActionButton widget. This widget, when pressed, will call a function _incrementCounter that will update _counter variable, but only in setState. This call to setState tells the Flutter framework that something has changed in this State, which causes it to rerun the build method below so that the display can reflect the updated values.
Note: If we changed _counter without calling setState(), then the build method would not be called again, and so nothing would appear to happen.
Now let's add a bit of font size and make the text data bold. If you also want app bar, you can add so using appBar parameter in the Scaffold widget
Lastly, on this lesson, we can finalize with, for instance, because our codebase can be too big on one file, we want to create a separate file for the StatefulWidget widget, or any other widget. This can be done as below:
Create a file in the same folder as main.dart and name it counter_action.dart. The stateful widget will now be moved to the new file as below:
Create a file in the same folder as main.dart and name it counter_action.dart. The stateful widget will now be moved to the new file as below:
Then the main.dart file will have to import the counter_action.dart file as below:
In this lesson, we're done for now. In the next lesson, we want to look more into Material Design Text and Color themes.