Working with Lists
You might need to create lists that display different types of content. For example, you might be working on a list that shows a heading followed by a few items related to the heading, followed by another heading, and so on.
Here’s how you can create such a structure with Flutter:
1 ~ Create a data source with different types of items.
2 ~ Convert the data source into a list of widgets.
To represent different types of items in a list, define a class for each type of item.
In this example, we will create an app that shows a header followed by five messages. Therefore, we will create three classes: ListItem, HeadingItem, and MessageItem.
Let's begin by creating an Interface for the Item class.
Okay. Now that that is done, let us proceed to implement Heading, the heading for the messages that will be in a list
Nice! Now, before we proceed further, let us see how we can access the Widgets in the Heading in a Stateless Widget
Next, we proceed to implementing Message class that will contain data related to the message content.
Creating the list
Most of the time, you would fetch data from the internet or a local database and convert that data into a list of items.
For this case, we generate the list of items to work with. The list contains a header followed by five messages. Each message has one of 3 types: Item, Heading, or Message.
For this case, we generate the list of items to work with. The list contains a header followed by five messages. Each message has one of 3 types: Item, Heading, or Message.
Convert the data source into a list of widgets
To convert each item into a widget, use the ListView.builder() constructor.
In general, provide a builder function that checks for what type of item you’re dealing with, and returns the appropriate widget for that type of item.
In the Stateless widget MyApp that we created, we want to pass a parameter to it, items, this parameter will be the list in the previous snippet.
In the widget itself, ListView.Builder will build the list into widgets, and hence, render them as widgets.
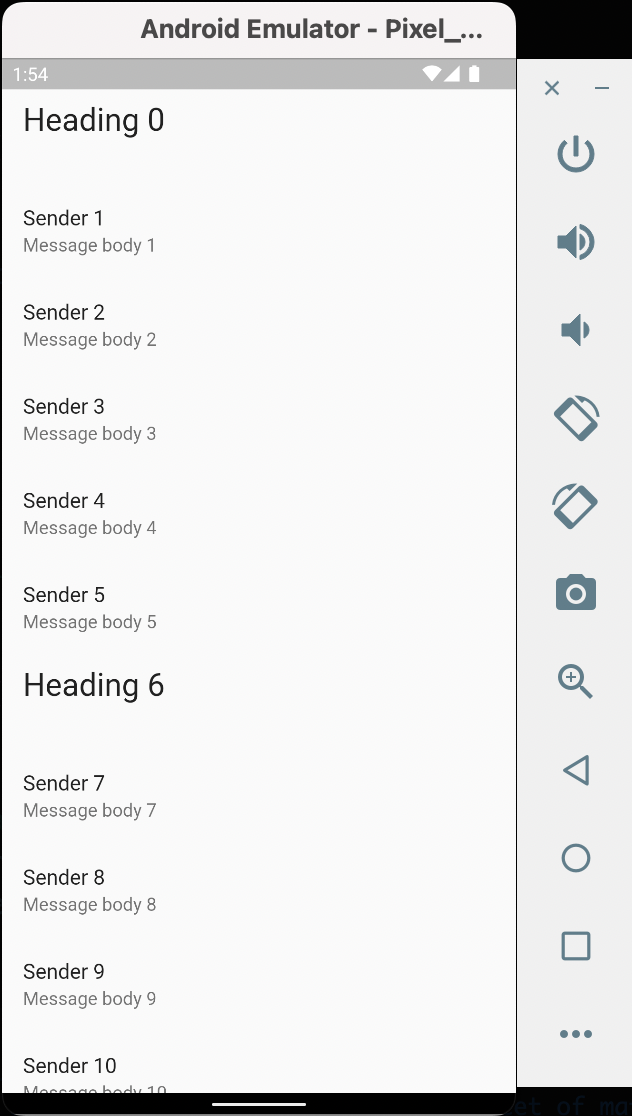
Hence a scrollable list is created with every n % 6 == 0 being a heading, where n is the current iteration of the list.
Leading and Trailing
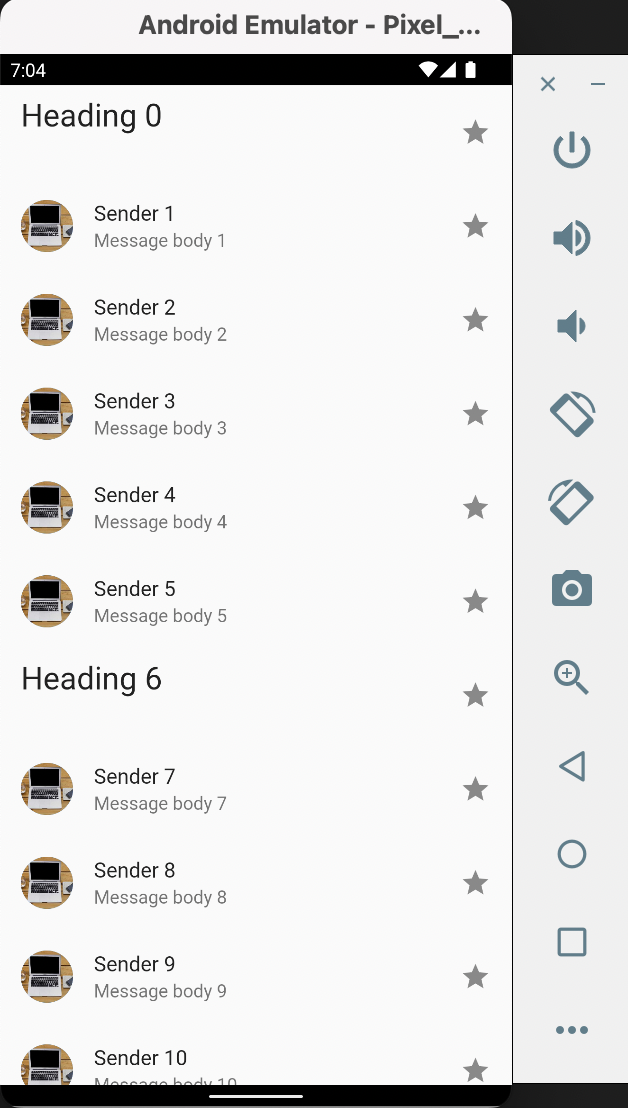
Leading and Trailing are parameters of ListTile used to set a child widget at the start and end of the ListTile widget respectively
In the ListTile, for Message widgets, I want to introduce leading images, and trailing icons.
In the ListTile, for Message widgets, I want to introduce leading images, and trailing icons.
SnackBar
It can be useful to briefly inform your users when certain actions take place. For example, when a user swipes away a message in a list, you might want to inform them that the message has been deleted. You might even want to give them an option to undo the action.
In Material Design, this is the job of a SnackBar.
Let's implement onTap of ListTile to show the SnackBar
In Material Design, this is the job of a SnackBar.
Let's implement onTap of ListTile to show the SnackBar
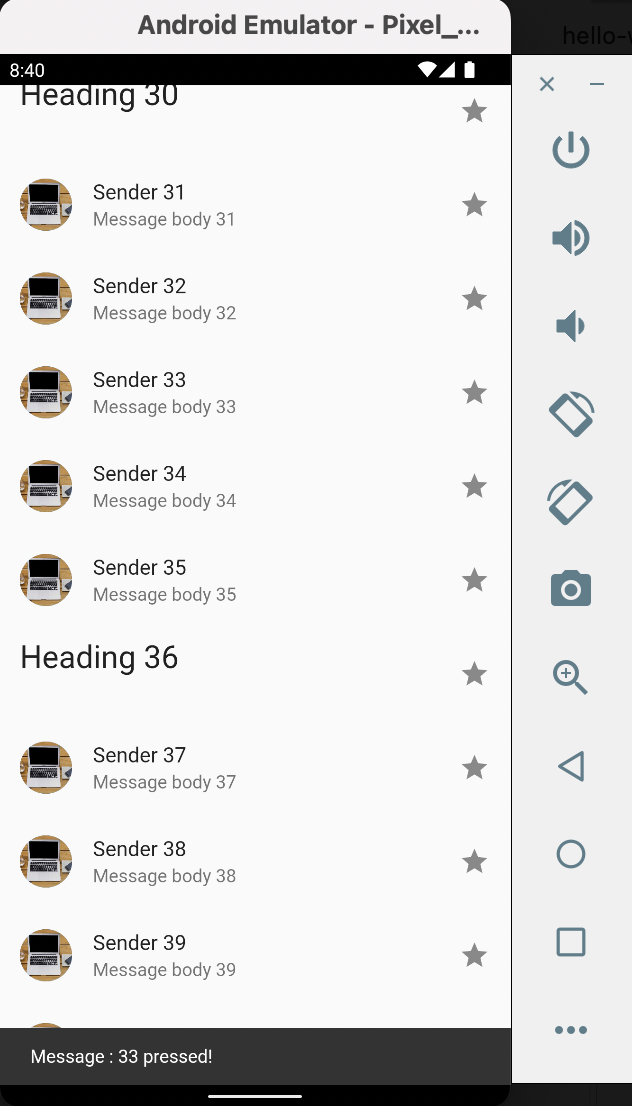
The line of code for ....hideCurrentSnackBar() is used when you press multiple widgets repeatedly, so the app has to close the pending SnackBar and show the new one, instead of showing the previous SnackBar for the whole duration of its visibility before showing the new one.