First steps
In the course, I'll be building the Google calculator app in Vue 3 (with TypeScript). For the styling, I'll be using TailwindCSS, a utility-first CSS framework packed with classes.
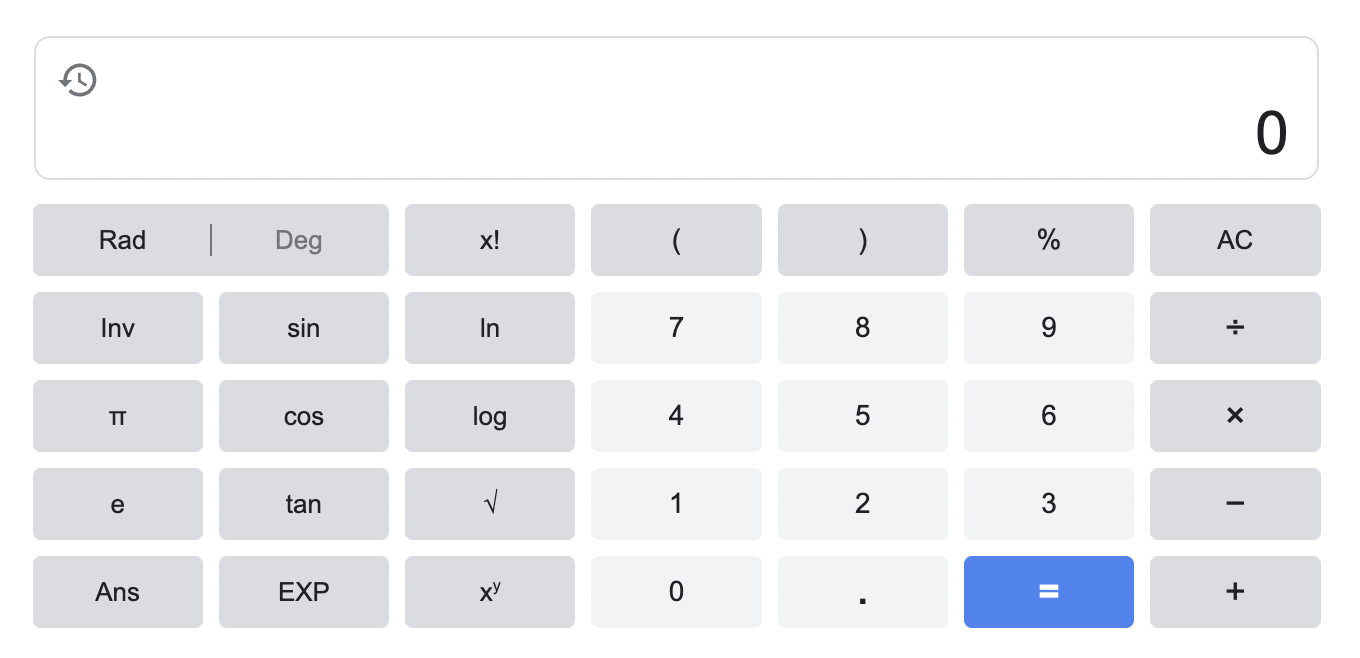
And this is it, the app to build...
And this is it, the app to build...
So, shall we?
Note: Make sure you have an up-to-date version of Node.js installed. I'm currently using v16.18.1.
Let's run:
Note: Make sure you have an up-to-date version of Node.js installed. I'm currently using v16.18.1.
Let's run:
npm init vue@latest|
            [NodeJS]$ npm init vue@latest

 Need to install the following packages:
    create-vue@3.6.1
 Ok to proceed? (y) y

 Vue.js - The Progressive JavaScript Framework

 ✔ Project name: … google-calculator
 ✔ Add TypeScript? … No / [Yes]
 ✔ Add JSX Support? … No / [Yes]
 ✔ Add Vue Router for Single Page Application development? … [No] / Yes
 ✔ Add Pinia for state management? … [No] / Yes
 ✔ Add Vitest for Unit Testing? … [No] / Yes
 ✔ Add an End-to-End Testing Solution? › No
 ✔ Add ESLint for code quality? … No / [Yes]
 ✔ Add Prettier for code formatting? … No / [Yes]

 Scaffolding project in /home/fedora-36-aarch64/Projects/NodeJS/google-calculator...

 Done. Now run:

 cd google-calculator
 npm install
 npm run format
 npm run dev
Now, after running these last 4 commands as required for the running of the app, the terminal output would be:
            VITE v4.2.1  ready in 932 ms

➜  Local:   http://127.0.0.1:5173/
➜  Network: use --host to expose
➜  press h to show help
Installing TailwindCSS
Install tailwindcss and its peer dependencies, then generate your tailwind.config.js and postcss.config.js files.
siliconSavanna@Fourier-PC
sh
npm install -D tailwindcss postcss autoprefixer|
~ Configure your template paths. Add the paths to all of your template files in your tailwind.config.js file.
Add the @tailwind directives for each of Tailwind’s layers to your ./src/style.css file.
touch src/style.css
Then, finally, import the file, style.css, to the main.ts file.
Okay, now let's stop the app (if it was running) and remove unnecessary files.
While in the src directory, let's first remove every file and directory within components directory, then edit style.css so that tailwind does not override heading tags (or any other tags overidden) that you want maintained.
Delete the other css files and then extend the major colors in Google Calculator in tailwind.config.js
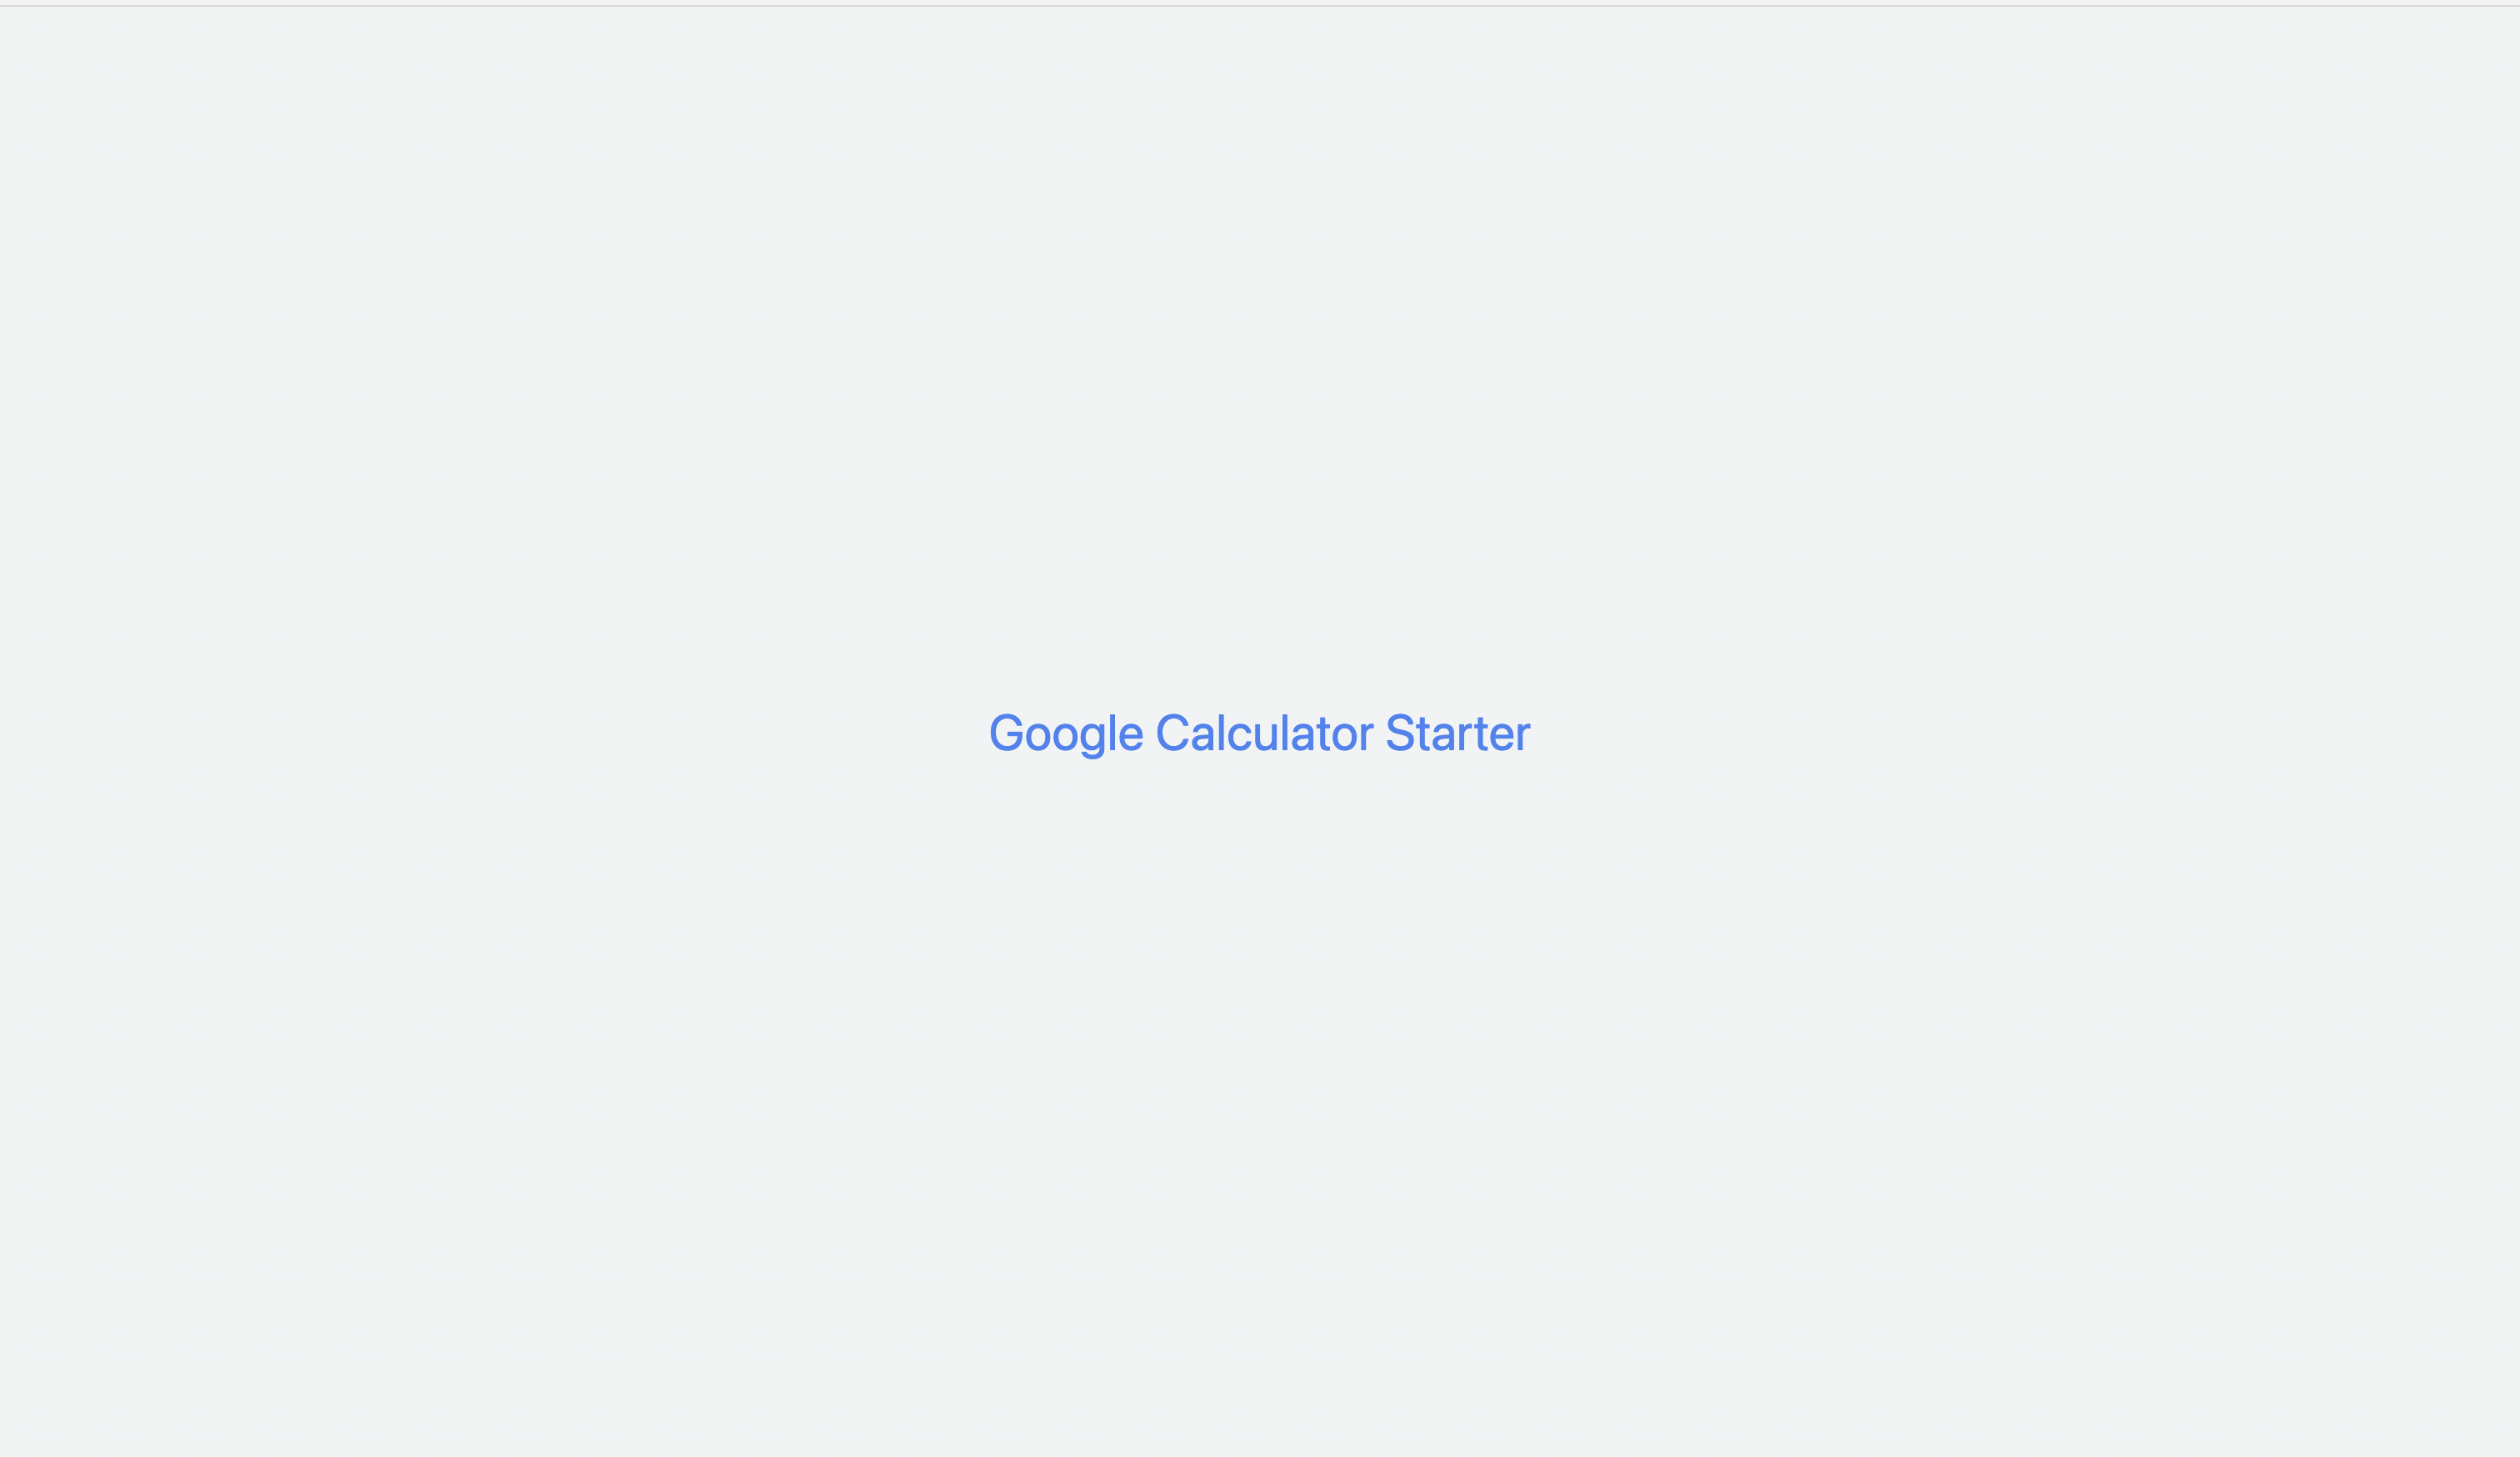
Cleaning up everything, the resulting codebase can be found on:
Calculator Starter
And then to clone it, use the command below, which fetches a single branch from the multi-project repository.
The --depth flag set to 1 is to only fetch the contents of the latest commit,
--single-branch is to set only a single branch to be fetched, specified by the --branch flag,
then the word after the git url, google, is the new name of the repo on local after cloning.
While in the src directory, let's first remove every file and directory within components directory, then edit style.css so that tailwind does not override heading tags (or any other tags overidden) that you want maintained.
Delete the other css files and then extend the major colors in Google Calculator in tailwind.config.js
Cleaning up everything, the resulting codebase can be found on:
Calculator Starter
And then to clone it, use the command below, which fetches a single branch from the multi-project repository.
The --depth flag set to 1 is to only fetch the contents of the latest commit,
--single-branch is to set only a single branch to be fetched, specified by the --branch flag,
then the word after the git url, google, is the new name of the repo on local after cloning.
siliconSavanna@Fourier-PC
sh
git clone --depth=1 --single-branch --branch google-calculator https://github.com/Marvin-desmond/interactive_courses_lessons.git google
And then after the cloning, repeating the last three commands during the running of the app, the resulting browser output is as shown below:
Setting up is complete. Now let's start to build the app in the next lesson!